Perform a skull-face overlap manually
Understanding camera parameters
Performing craniofacial superimposition involves superimposing a 3D model of a skull over an ante-mortem photo showing the face of a certain person. The analyst carrying out the task aims to have the skull overlaying the face of the subject by matching its position, pose and size.
This suggests the idea that a superimposition simply involves visualizing and manipulating a 3D model by means of translation, rotation and scaling operations. This is what photo editing software such as Adobe Photoshop provide. However, a closer look at the superimposition process reveals that there is more to it. The appearance of the face in a photo is determined by the way the photo has been acquired.
This involves not just where the camera was placed and what it was aimed at, but also the specific kind of camera, the lens and the camera settings used to take the photo. When performing a superimposition, the analyst is aiming to reproduce the ante-mortem photo by taking a photo of the skull under the same conditions. It this therefore essential to understand what factors are involved in acquiring a photo and what is their effect on the appearance of skull. These factors are called camera parameters.
The pinhole camera model
 Figure 1. A pinhole camera. Although without optical lenses, this early type of camera provides a mathematical model for all modern cameras.
A pinhole camera is an early type of camera where light is focused by a tiny aperture in the front wall. More recent cameras, including modern digital cameras, use lenses instead. Nevertheless, all cameras behave essentially as pinhole cameras, and indeed the mathematical model of a camera is called the pinhole camera model. The model describes how a point of the 3D space being photographed is projected onto the 2D plane of the photo. In other words, the camera model provides a mathematical formula that, given the coordinates of a point of the 3D space, allows to calculate the corresponding coordinates of the point in the photo. While most real cameras do not follow the pinhole camera model exactly, the model is precise enough for applications to CFS.
The camera model is what specifies the camera parameters, which are a series of factors that determines how a photo is being taken. Before going further, let us consider an example. A camera has been placed in front of a statue with a colored pillar and red sphere behind it. This scene is depicted in Figure 2. right side; the orange box is the camera. Figure 2, left side shows the actual picture acquired by the camera.
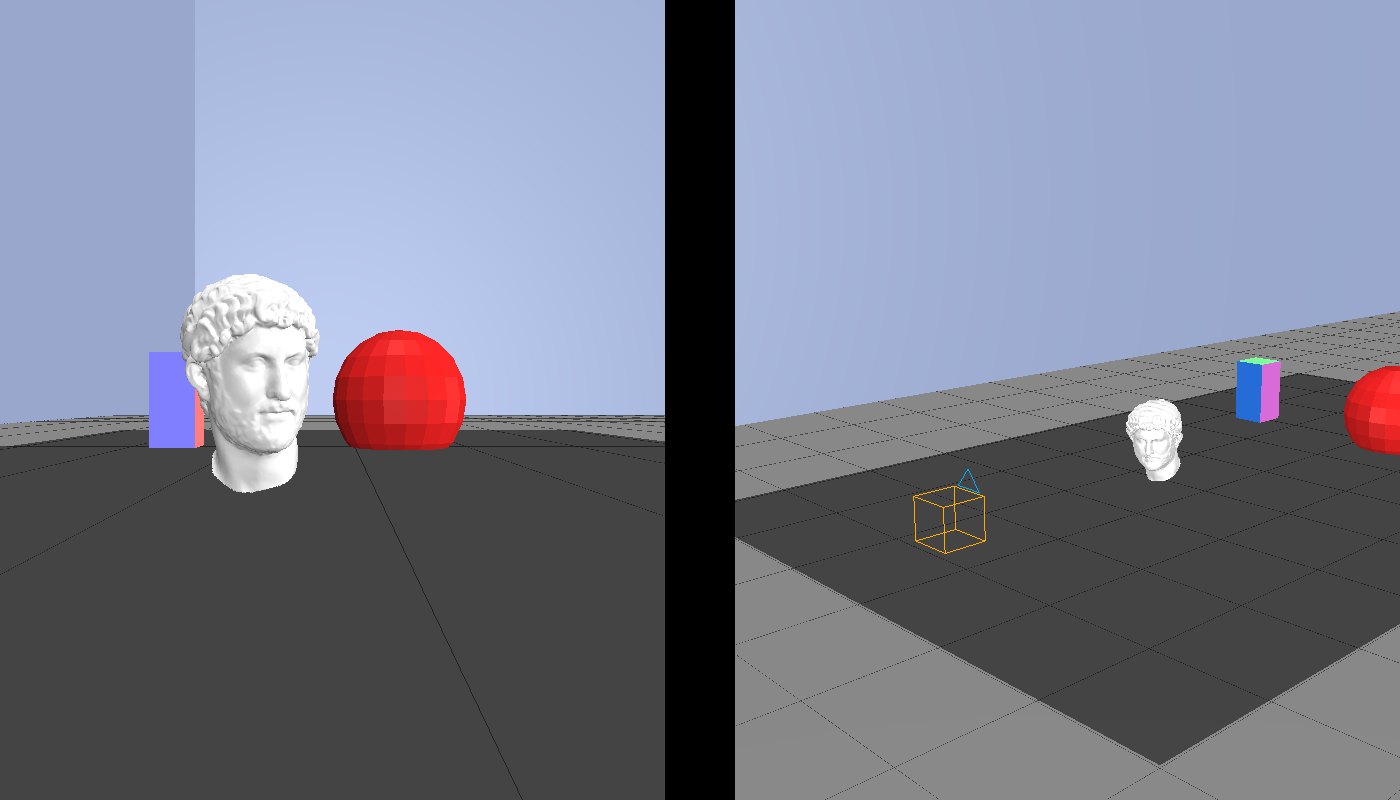 Figure 2. On the right, the example scene being photographed by a camera (orange box). On the left, the picture taken by the camera.
With this scenario in mind, we now introduce the camera parameters and show their effect over the photo.
-
Camera position. This is the location of the camera, represented by a point in 3D space.
-
Camera orientation. The direction the camera is facing, represented through three angles.
Figure 3.1. The effect of a rotation along an axis.
Figure 3.2. The effect of a rotation along an axis.
Figure 3.3. The effect of a rotation along an axis.
Figure 3.4. The effect of a rotation along an axis.
- Focal length. This is a feature of the lens being used; it determines the angle of view of the photo or, loosely speaking, the amount of zoom. Typical values belong to the range 18-300 mm. Small focal length values correspond to wide angle photos and vice-versa. Figure 4 shows four photos of the same scene taken at 35, 70, 100 and 150 mm; notice the camera doesn’t move but the subject gets bigger as the focal length increases. The range of focal length available in a camera depends on the specific lens installed. Often, the focal length value used by a digital camera is recorded with the photo in the EXIF metadata, allowing its value to be set manually.
Figure 4.1. Photo of the scene taken at 35 mm.
Figure 4.2. Photo of the scene taken at 70 mm.
Figure 4.3. Photo of the scene taken at 100 mm.
Figure 4.4. Photo of the scene taken at 150 mm.
-
Sensor size. This is the physical width of the film or digital sensor that captures the image. It has a similar but opposite effect with respect to focal length, i.e. halving the size of the sensor results in the same photo as doubling the focal length. Most professional camera have a sensor size of 35 mm.
-
Subject-to-camera distance (SCD). It is the actual distance between the camera and the subject. Varying the subject-to-camera distance obviously alter the camera position. If the camera gets closer to the subject, the latter appears larger in the photo. However, unlike increasing the focal length, lowering the SCD would result in the subject showing perspective distortion. When the latter occurs, the part of the head being closest to the camera (usually the nose) appears unnaturally large with respect to the rest of the head. The opposite happens to the further parts of the face, e.g. hair and ears.
Figure 5 shows a comparison between a close-up shot and one taken at high focal length. While the apparent size of the head is similar in the two photos, the one with small SCD show noticeable signs of perspective distortion.
Figure 5.1. Comparison between a close-up shot and one taken at high focal length.
Figure 5.2. Comparison between a close-up shot and one taken at high focal length.
- Principal point. The displacement of the principal point is a phenomenon that can be found in wide-angle (small focal length) photos that have been cropped. Consider the following image.
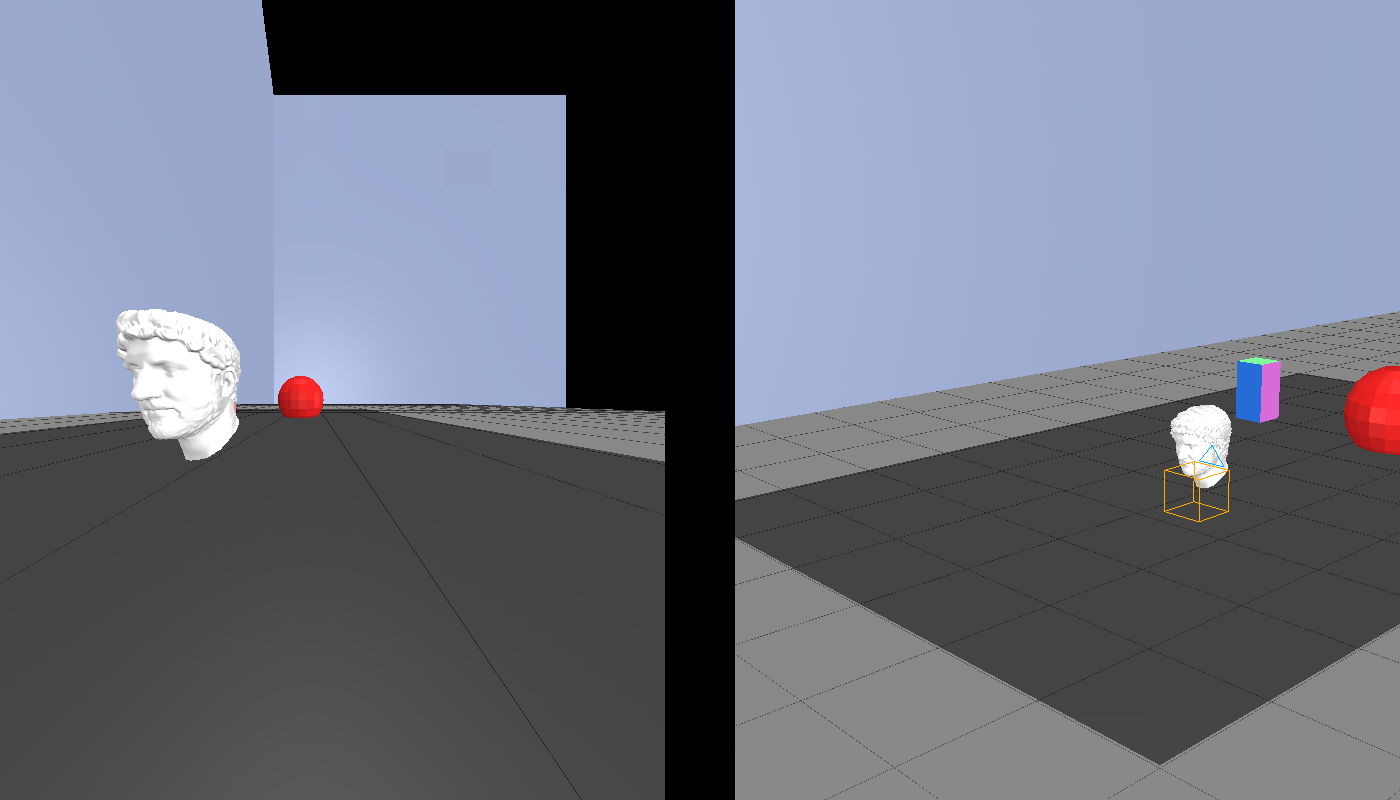 Figure 6.1. A close-up photo with lines converging towards the center.
One can notice the subject appears to be stretched horizontally due to perspective distortion. Focusing on the lines on the floor, one can easily recognize the pattern of this distortion: lines that are parallel in the actual scene appear to converge towards the center of the photo. Then, consider this image.
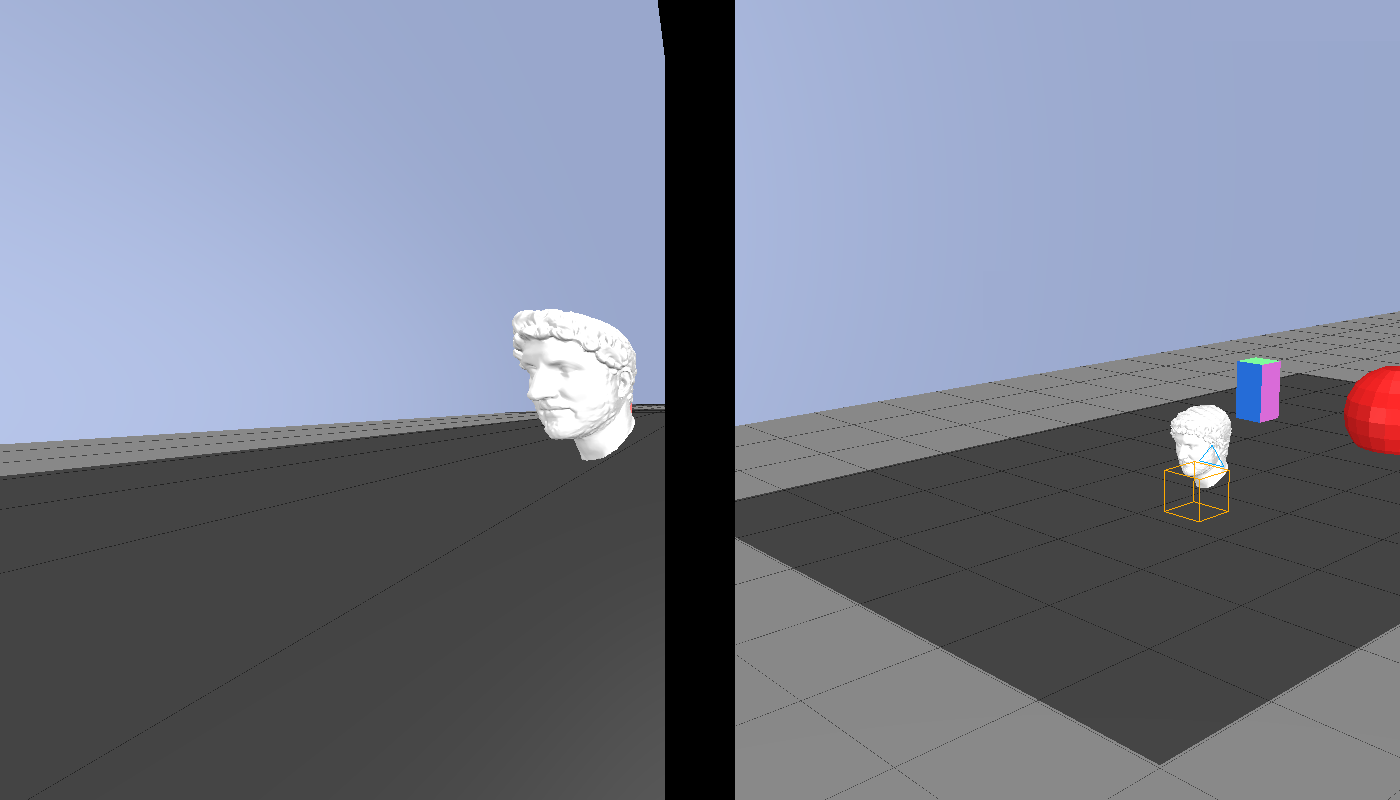 Figure 6.2. Una fotografía recortada. Las líneas en el suelo convergen fuera la imagen.
The lines appear to converge, but not towards the center of the photo, rather outside of it. This is a sign that the photo has been cropped. The original image was much wider and had lines converging to the center of it. The principal point is the point where the lines converge; by displacing it one, can reproduce the effect the photo being a portion of a larger photo. When introducing values for the principal point, there is a horizontal and vertical axis, with 0 corresponding to the center, -1 to the leftmost/uppermost point and 1 to the rightmost/lowermost one. The principal point is seldom changed alone, but rather as part of the change parallax operation described in the next section.
Advanced camera operations
This section includes two complex operations, each changing two camera parameters at once with a specific purpose.
- Change perspective. This operation combines a reduction in focal length with a reduction in subject-to-camera distance. The former makes the subject smaller, while the latter makes it bigger. The overall effect is that the apparent size of the subject does not change, but the amount of perspective distortion is increased. These operations allow to change the amount of perspective distortion without changing the apparent size of the subject.
Figure 7.1. Change perspective.
Figure 7.2. Change perspective.
Figure 7.3. Change perspective.
Figure 7.4. Change perspective.
- __Change Parallax___. This operation combines a displacement of the principal point with a translation of the camera.
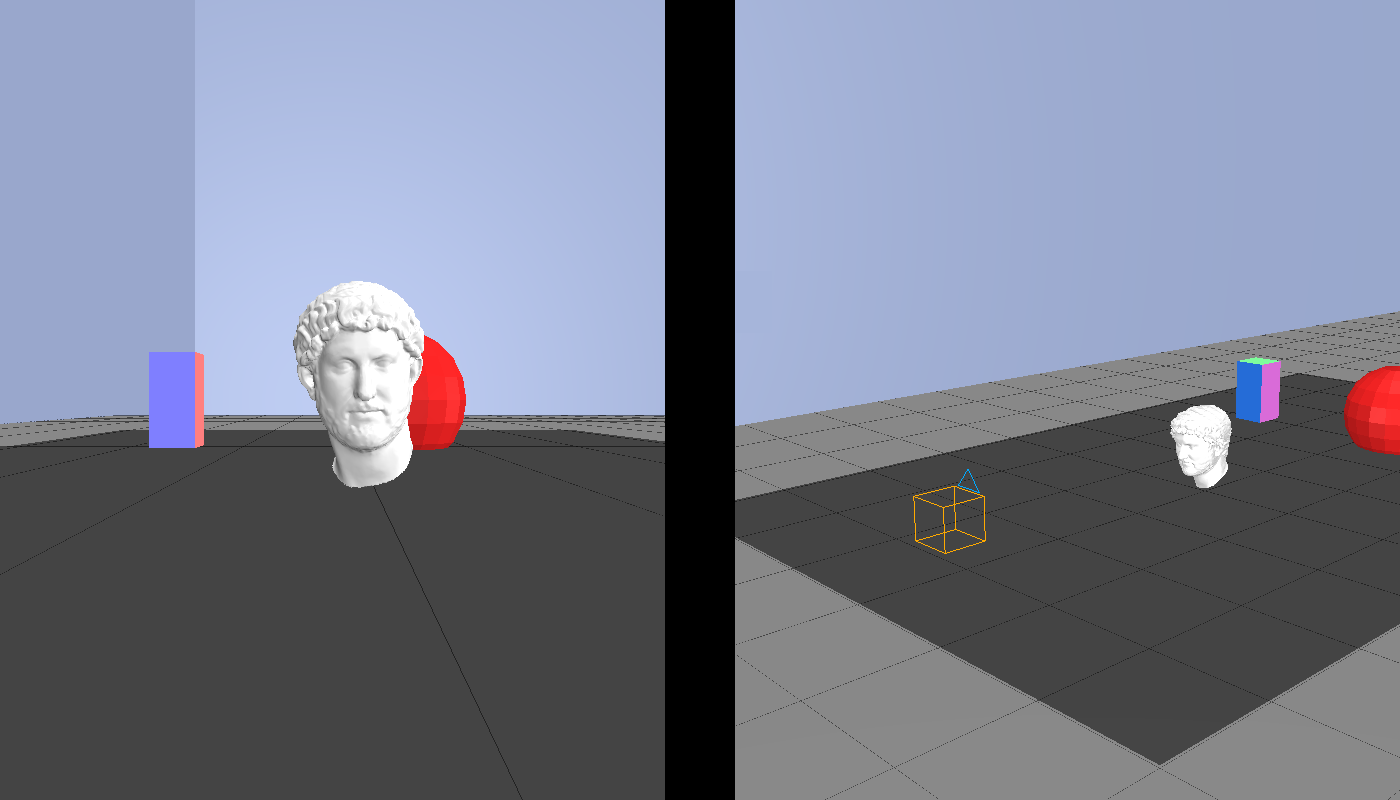 Figure 8.1. The subject lies at the center of the photo.
While moving the principal point produces a stretching of the subject, it also displaces the subject from its original position.
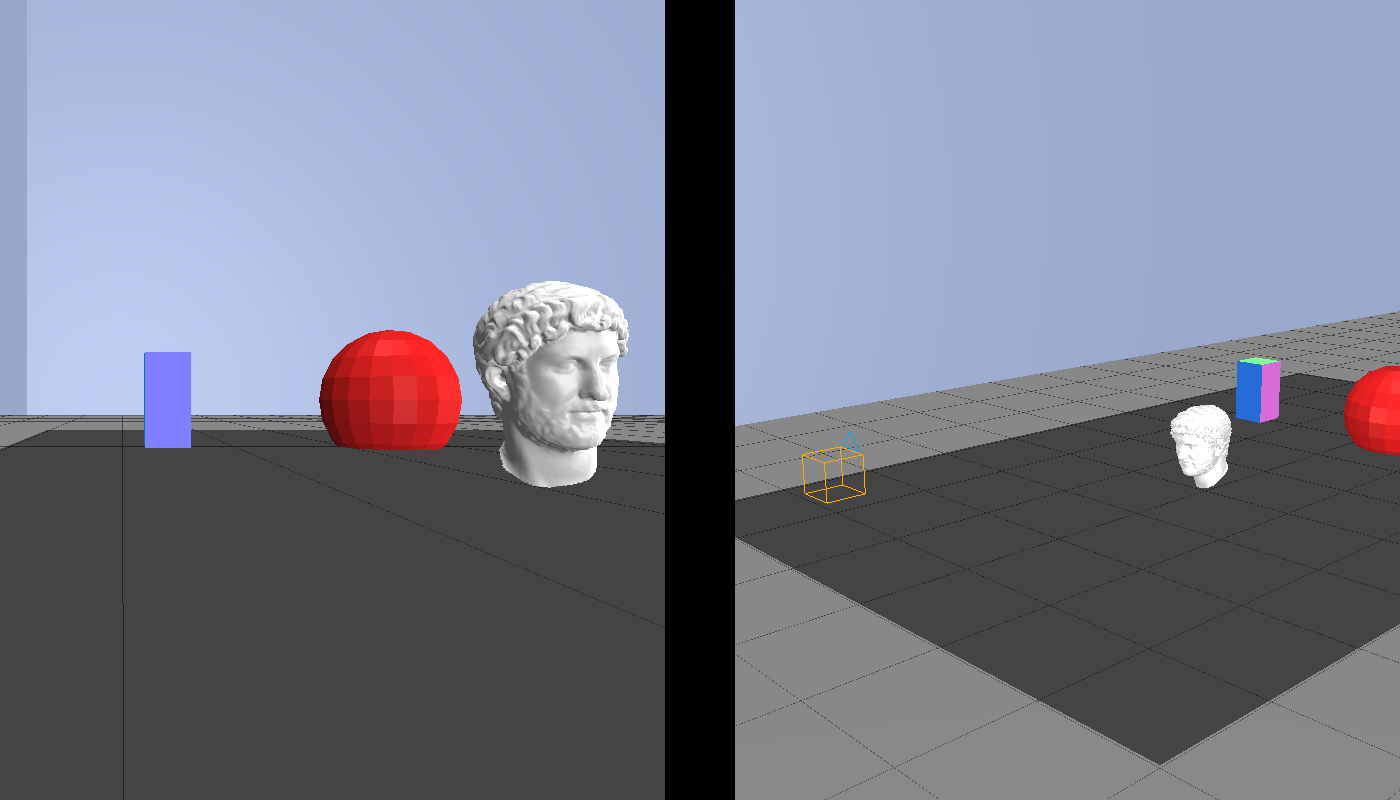 Figure 8.2. After displacing the principal point, the subject is no longer in the center.
The camera movement performed in this operation prevents the latter effect, keeping the subject in the same location.
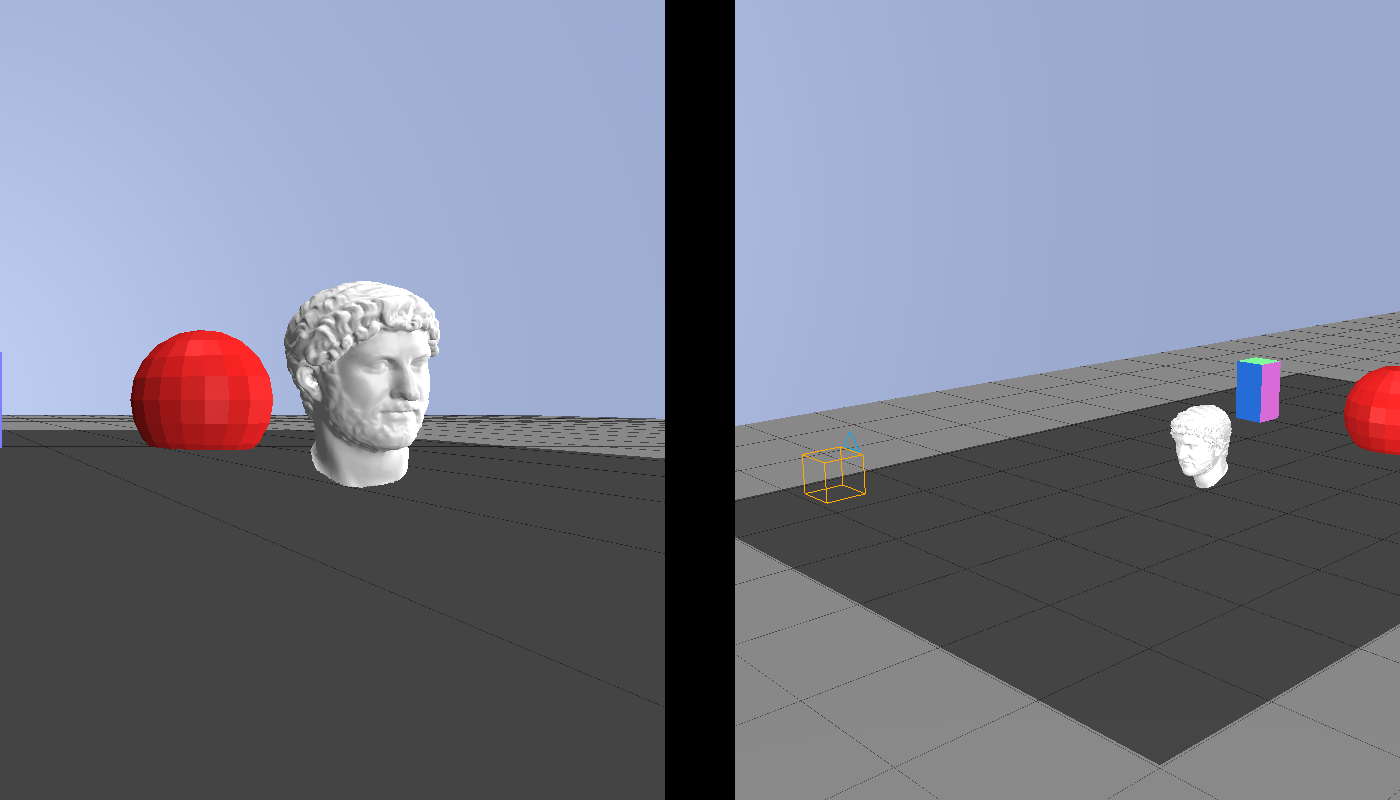 Figure 8.3. Displacing the camera gets the subject back to the center of the photo.
Basic camera operations in Skeleton·ID
To replicate the exact pose of the subject´s face in the photograph with the 3D model of the skull, we can do it manually through the basic camera operations: rotation, translation, and camera-subject distance.
-
We Will carry out the rotation of the skull by placing the mouse over it and holding down the left mouse button while dragging it.
-
To move / translate the skull, place the mouse over it and hold down the mouse wheel while dragging it.
-
To enlarge / reduce the distance between the camera and the skull (a reduction / increase in the apparent size of the skull is observed), simply place the mouse over any point of the skull and use the mouse wheel towards us (to increase the distance), or out, to reduce it.
| CONTROLS | ACTIONS |
|---|---|
| Left mouse button pressed + drag | Skull rotation |
| Mouse Wheel pressed + drag | Skull translation |
| Mouse Wheel in or out | Camera-subject distance |
If we prefer, we can show and activate a widget of roto-translation (and translation axes) analogous to that of the 3D scene by clicking on the button  .
.
 Figure 9. Skull-face overlap scene showing the performance of a manual overlap with the roto-translation widget activated.
At any time, during the overlapping process, we can reinitialize the position of the skull using the button  so that we will reinitialize the camera parameters and the skull will be displayed in the center of the image.
In addition, we can adjust the sensitivity of the camera controls using the “sensitivity” slide, located in the camera effects (Figure 10). It can be modified by selecting the circle and moving it (hold down the left mouse button) to the left for greater sensitivity (slower / precise movements) or the right for less sensitivity (faster movements).
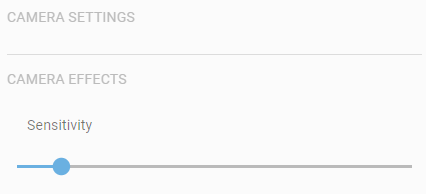 Figure 10. Camera effects. Slide to modify the sensitivity of the camera controls.
Advanced camera operations in Skeleton·ID
Advanced camera operations include main point movement, focal change, and sensor size. The way to modify these three parameters is through their corresponding forms, either by entering a specific numerical value, or by using the arrows to increase / decrease the current value.
 Figure 11. Advanced camera parameters.
The purpose of these three parameters is briefly described below (see Understanding Camera Parameters section):
-
Main point: It is generally assumed that the main point of a photograph is in the center of the photograph. However, if it has been clipped, the main point will have been displaced and therefore will need to be estimated to model the perspective warps correctly.
-
Focal: is the focal length of the camera lens. The focal length determines the angle of view of the photograph, or the optical zoom. More focal lengths are between 18 mm and 300 mm. A small focal length means a wide angle of view, while a high value means a narrower angle of view.
-
Sensor size: this is the width of the photographic film or digital sensor where the image is captured. Most professional cameras use a 35 mm wide sensor.
Complex camera operations in Skeleton·ID
Complex camera operations include perspective and parallax (Figure 12). These two operations are a combination of changing several camera parameters at the same time.
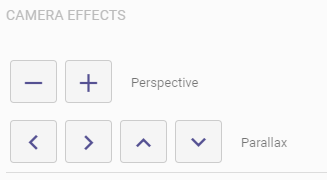 Figure 12. Complex camera operations.
-
The perspective operation combines a reduction in the focal length with a reduction in the camera-subject distance. The first operation makes the object smaller, while the second makes it larger. The general effect is that the apparent size of the object does not change, but it does increase or reduce the perspective distortions present in the object. Therefore, this operation allows us to modify the perspective distortion without changing the apparent size of the object.
-
The parallax operation combines a displacement of the main point with a translation of the camera. The result is that the main point of the image changes without changing the apparent position of the object.